How to Use Posteriza: Step-by-Step Guide for Giant Posters [2026]
Want to turn a digital photo into a massive wall mural but don’t have a wide-format printer? You don’t need one. With Posteriza, you can use your standard home printer (A4 or Letter size) to print “tiles” that fit perfectly together.
In this guide, we will walk you through the exact settings to get the best quality on Windows 10 and Windows 11.
📋 What You Need
- Posteriza Software: Not installed yet? Download it here for free.
- A High-Quality Photo: JPG or PNG format (at least 2000px width recommended for best results).
- Printer: Any standard Inkjet or Laser printer loaded with A4 or Letter paper.
- Scissors & Glue/Tape: To trim the margins and assemble your masterpiece.
Step 1: Open Your Image
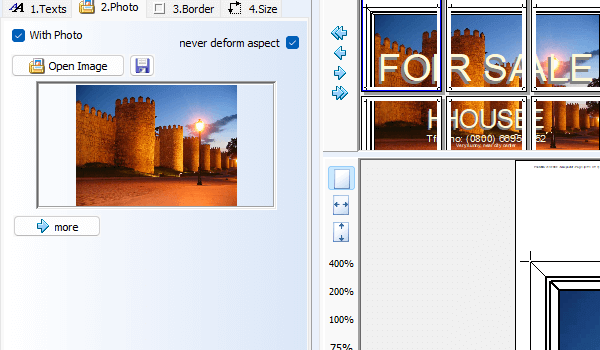
Launch Posteriza. You will see the main interface with a live preview on the right. First, navigate to the “Photo” tab on the left sidebar.
- Click the Open Image folder icon.
- Select your JPG or PNG file from your computer.
- Once loaded, you can see it appear in the preview window.
Step 2: Add Custom Text (Optional)
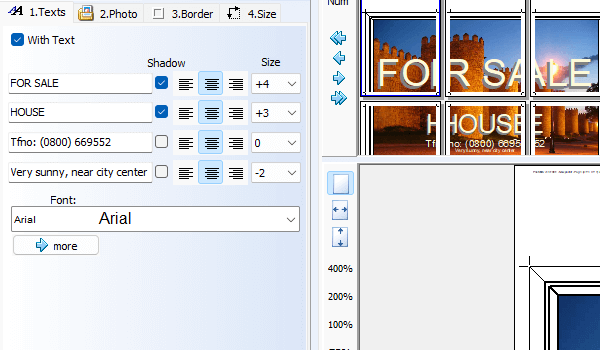
Posteriza is famous for its powerful text engine. If you want to add a headline (e.g., “Happy Birthday” or “Sale”), go to the “Text” tab.
You can add up to 4 lines of text. For each line, you can customize:
- Font: Choose any font installed on your Windows system.
- Size & Color: Make it bold and bright.
- Shadows: Add a drop shadow to make the text readable against complex backgrounds.
Note: If you don’t want any text, simply clear the text fields or uncheck “With Text”.
Step 3: Define Poster Size (Crucial)
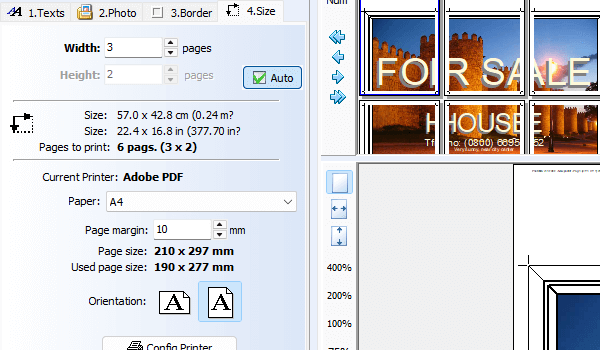
Now, go to the “Size” tab. This is where the magic happens. Instead of defining inches or centimeters manually, Posteriza uses a “Page Count” system.
⚙️ Recommended Settings:
- Width (pages): Determines how many sheets of paper wide your poster will be. (e.g., 3 pages width = approx 60cm wide).
- Height (pages): Usually set to “Auto” to maintain the aspect ratio.
- Paper Size: Ensure it matches your printer paper (A4 or Letter).
- Orientation: Choose Landscape or Portrait based on your photo.
As you change the number of pages, look at the Preview Window. The red grid lines show exactly how the image will be sliced.
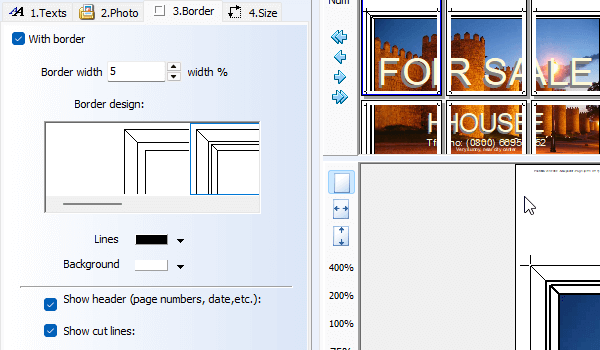
Step 4: Configure Borders & Margins
Navigate to the “Border” tab. This controls the style of the frame around your poster and, more importantly, the cutting guides.
- Draw Border: Check this if you want a classic frame around the entire artwork.
- Cut Lines: (Important!) Keep this checked. These are the faint dotted lines that tell you exactly where to cut the white margins off after printing.
- Margins: You can usually leave these at default (1.00 cm), or adjust if your printer supports borderless printing.
Step 5: Print or Save as PDF
Ready to go? Click the “Apply” button to lock in your settings.
- Direct Print: Click the Printer icon in the toolbar. Select your printer and hit OK.
- Save as JPG: If you want to print later or take the files to a print shop, click the “Save” icon. This will export each tile as a separate image.
- Print to PDF (Recommended): We recommend selecting “Microsoft Print to PDF” as your printer. This creates a single PDF file containing all pages, which is safer to preview before wasting ink.
✂️ How to Assemble Your Poster
1. Trim Margins
Cut off the white margins on the Right and Bottom sides of each sheet. Leave the Left and Top margins intact—you will use these as gluing tabs.
2. Overlap & Glue
Apply glue (glue stick is best) to the white margin you left intact. Overlap the next sheet on top of it, aligning the image perfectly.
3. Mount on Wall
Assemble the poster row by row on a flat floor first. Once taped together, use Blue Tack or double-sided tape to mount the full mural on your wall.
Too Complicated?
If cutting and gluing sounds like too much work, you can design a digital poster online in minutes.
Create Poster Online with Canva (Free) →