How to Assemble a Tiled Poster: Cut, Align & Glue Like a Pro (2026)
The Assembly Workflow (Overview)
Printing the tiles is only half the job. A clean assembly is what separates a “taped-together school project” from a poster people assume came from a print shop. The full workflow:
- Let the prints dry (10–15 min for inkjet)
- Trim the white margins
- Dry-lay and number the backs
- Align row by row
- Glue or tape
- Mount or laminate (optional)
- Hang
Step 1 – Let Inkjet Prints Dry
Inkjet ink sits on the paper surface. Handling prints immediately causes smudges and fingerprints in dark areas. Lay the sheets out for 10–15 minutes before cutting. (Laser prints are dry instantly — one small advantage of laser for posters.)
Step 2 – Trim the White Margins
For invisible seams, trim one edge of each tile along the image — or both edges if you want zero white lines. Tools that matter:
- Rotary cutter + self-healing mat: the pro combo. Fast, straight, safe. A cutting mat and rotary cutter set pays for itself on the first large poster.
- Metal ruler + craft knife: works, but slower and easier to slip.
- Scissors: only for small posters; edges wander on long cuts.
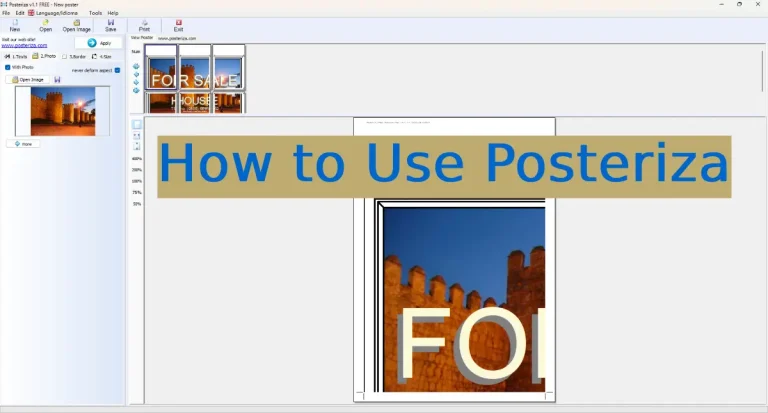
Tip: cut with the printed side down against the mat using the tile’s printed edge as your guide, or use Posteriza‘s overlap guides — the overlap zone is designed to be trimmed along a printed line.
Step 3 – Dry-Lay and Number the Backs
Before any glue touches paper, lay out all tiles on the floor in final position. Then flip each tile and write its coordinates on the back (e.g. “R2C3” = row 2, column 3). On a 36-sheet poster, this numbering is the difference between a fun afternoon and a jigsaw nightmare.
Step 4 – Align Row by Row
Work one row at a time, left to right. Butt the trimmed edges together — do not overlap image areas unless you set an overlap in Posteriza (then align using the overlap guides). A light pencil tick at each seam on the back helps you re-find alignment after lifting a tile to apply glue.
Step 5 – Glue, Tape, or Spray?
| Method | Best for | Pros | Cons |
|---|---|---|---|
| Glue stick | Small posters (<12 sheets) | Cheap, forgiving, repositionable for ~30 sec | Weak on heavy paper; slow for big jobs |
| Double-sided tape | Medium posters | Clean, no drying time | Unforgiving — no repositioning |
| Spray adhesive | Large posters, mounting | Fast, even, strong | Needs ventilation; overspray |
| Washi / masking tape (back) | Temporary display | Removable, no damage | Visible from the front on thin paper |
For posters over 20 sheets, repositionable spray adhesive is the professional choice: mist the back of each tile, wait 30 seconds until tacky, then lay it down. Mistakes peel right back up.
Step 6 – Mount or Laminate (Optional but Worth It)
- Foam board mounting: turns a floppy paper poster into a rigid display panel. Spray-mount the assembled poster onto 5 mm foam board, trim flush.
- Lamination: self-adhesive laminate rolls protect classroom posters that get handled daily. Apply slowly with a ruler to squeegee out bubbles.
Step 7 – Hang Without a Frame
- Poster hangers (magnetic wooden bars top and bottom) — the cleanest look.
- Binder clips + nails — industrial chic, zero cost.
- Painter’s tape loops on the back — rental-friendly, no wall damage.
- Washi tape borders — doubles as decoration for kids’ rooms.
Frequently Asked Questions
Should I cut off the white borders?
Yes, at least on the joining edges — untrimmed white margins leave a visible grid over your image. Trim along the printed edge for invisible seams.
Glue stick or spray adhesive for a large poster?
Spray adhesive, no contest beyond ~20 sheets. Glue sticks dry out mid-job and weaken on heavy photo paper.
How do I keep tiles aligned while gluing?
Number the backs during dry-lay, work row by row, and use light pencil ticks at seams. Repositionable spray lets you lift and re-stick mistakes.
Can I laminate a tiled poster?
Yes — assemble first, then apply self-adhesive laminate over the whole surface. It also hides minor seam imperfections.
How do I hang a big paper poster without damaging the wall?
Painter’s tape loops or removable adhesive strips on the back. For a finished look, magnetic poster hangers need only two small nails.
Related: how many A4 sheets you need · best paper for posters · fix printing problems
Disclosure: This page contains affiliate links. If you buy through them, we may earn a commission at no extra cost to you.